Telescopes Celestron
All Telescopes Advanced filters → |
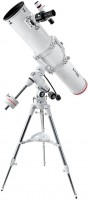
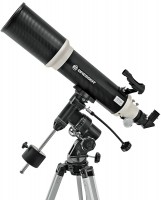
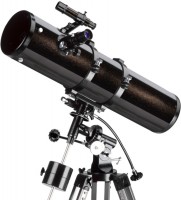
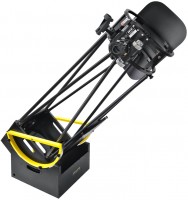
Popular modelsCompare using chart →
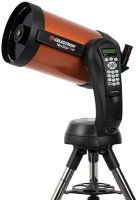
300 x, catadioptric (Cassegrain), focal 1500 mm, lens 127 mm, autotracking, электронное управление
406 x, catadioptric (Cassegrain), focal 2032 mm, lens 203 mm, autotracking, электронное управление
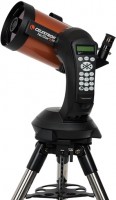
250 x, catadioptric (Cassegrain), focal 1250 mm, lens 125 mm, autotracking, электронное управление
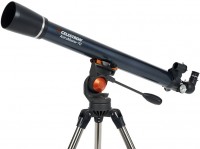
260 x, mirror, экваториальный EQ4, focal 1000 mm, lens 130 mm, autotracking, электронное управление
You might be interested in
Telescopes: specifications, types
Show all
Design
The design characterizes the general principle of the optical system of the telescope.
— Lens (refractors). As the name implies, in such telescopes, a system of lenses is responsible for building the image. Their main advantages are simplicity of design and use, as well as unpretentiousness to shaking, shock and adverse weather conditions (which facilitates outdoor use, including in the cold season). On the other hand, this scheme of operation requires the use of long tubes, which accordingly affects the dimensions of the structure, and the diameter of the lenses (see below) for refractors as a whole is noticeably smaller than for reflectors. In addition, lenses are subject to various distortions, in particular, chromatic aberrations, which lead to the appearance of colour halos and reduce image quality. However, modern telescopes often use various design tricks to neutralize these distortions. Refractors are well suited for observations of relatively close objects such as the Moon or planets, as well as panoramic observations at a relatively low power. In addition, this option is considered optimal for beginner astronomers, including children.
— Mirror (reflectors). In telescopes of this design, the role of the lens is played by a concave mirror, which provides the main magnification of the image. The simplest and mos...t popular reflex scheme — Newton's telescope — involves a combination of a concave main mirror with an additional flat one, which reflects the image into the eyepiece. There are other variations of reflectors, but they are much more complicated and expensive, and therefore they have not received distribution in amateur astronomy. Anyway, telescopes of this type, being simpler, cheaper and more compact than refractors, have larger lenses and are less prone to distortion, which makes it possible to obtain high-quality images of fairly distant objects. Their main disadvantage is delicacy and difficulty in handling. Thus, mirrors are sensitive to shocks and shocks, the optics need to be adjusted from time to time, and before starting observation, it is necessary to wait for temperature equilibrium — otherwise the difference in air temperatures in the tube and outside will lead to a loss of image clarity (the same "haze" effect that can be seen above hot asphalt on a summer day). Also note that most reflectors give distortions at the edges of the image (the so-called "coma"), which narrows the actual field of view and makes it difficult to use them for astrophotography. However, in many models this drawback has been corrected, in others it is possible to use corrective lenses and other similar accessories, due to which reflectors are still the most popular option among astrophotographers.
— Mirror lens. Such telescopes, in fact, are mirror models (see above), designed according to specific schemes and supplemented with corrective lenses to eliminate various distortions. Thanks to this, it becomes possible to further improve the quality of the "picture" compared to classical refractors, while at the same time retaining their main advantages — primarily compactness and relatively low cost. Among the mirror-lens models, there are also several different systems. Thus, Schmidt-Cassegrain systems are compact, inexpensive, and not as sensitive to small shocks as classical Newtonian reflectors; and the Maksutov systems (Maksutov-Cassegrain for close objects and Maksutov-Newton for distant ones) are somewhat more expensive, but are considered more advanced.
Mount type
The type of mount the telescope is equipped with.
A mount is a mechanical unit with which the telescope is attached to a tripod or (in some cases) installed directly on the ground. In addition to mounting, this unit is also responsible for pointing the optics at a certain point in the sky. The most popular nowadays are azimuth devices in different variations - AZ1, AZ2, AZ3, as well as in the form of the so-called Dobson mount. Equatorial mechanisms of different models ( EQ1, EQ2, EQ3, EQ4, EQ5) are noticeably more complex and more expensive, but they provide more possibilities. There are systems that combine both of these types of mounts at once - the so-called azimuth-equatorial ones. And finally, some telescopes are supplied without a mount at all. Here's a more detailed description of these options:
- Azimuthal. The full name is “alt-azimuth”. Traditionally, it has two axes of rotation of the telescope - one for pointing in altitude, the second in azimuth. Different models of such mounts differ in additional control capabilities:
- Dobson. A specific variation of the alt-azimuth mounts described above, used almost exclusively in reflectors. It also provides two axes of rotation - horizontal and vertical. The key feature of the Dobsonian mount is that it is not designed for a tripod and is mounted directly on the ground or other flat surface; For this purpose, the design provides a wide, massive base. Such systems are excellent for Newtonian telescopes, in which the eyepiece is located in the front part: thanks to the low position of the tube on the mount, the eyepiece itself is at a fairly convenient height. Also, the advantages of “Dobsons” include simplicity, low cost and at the same time good reliability, making them suitable even for large and heavy telescopes. Among the disadvantages, we should note the poor compatibility with uneven surfaces, especially hard ones, like solid rock (while tripods used with other types of mounts do not have this disadvantage).
- Equatorial. Mounts of this type make it possible to synchronize the movement of the telescope with the movement of celestial bodies across the sky, resulting from the rotation of the Earth. The conventional vertical axis, responsible for rotating the telescope from side to side, in such mechanisms is called the right ascension axis (RA), and the horizontal (for pointing along the conventional vertical) is called the declination axis (Dec.). Before use, the equatorial mount is adjusted so that the right ascension axis is directed to the “celestial pole”, parallel to the axis of rotation of the Earth (“the celestial axis”); the specific inclination relative to the vertical depends on the geographic latitude of the observation site. This format of work significantly complicates both the design of the mount itself and the installation procedure. On the other hand, equatorial systems are ideal for long-term “accompaniment” of astronomical objects: in order to compensate for the movement of a celestial body due to the rotation of the Earth and keep the target in the field of view, it is enough to rotate the telescope around the RA axis to the right (clockwise), and with a clearly defined speed - 15° per hour, regardless of the vertical position of the object. This makes such designs ideal for astrophotography, including deep space objects that require long exposures. In fact, this does not even require a full-fledged auto-tracking system - a relatively simple clock mechanism that rotates the telescope around the right ascension axis is enough. The downside of these advantages, in addition to the mentioned complexity and high cost, is their poor suitability for large, heavy telescopes - as the weight of the instrument increases, the weight of a suitable equatorial system increases even faster.
As for the different models of such mounts, they are marked with an alphanumeric index, from EQ1 to EQ5. In general, the higher the number in the designation, the larger and heavier the structure itself (including the tripod, if supplied), the less suitable it is for moving from place to place, but the better it dampens vibrations and shocks. But the restrictions on the weight of the telescope are not directly related to the equatorial mount model.
— Azimuthally-equatorial. Mechanisms that combine two types of mounts. It looks like this: an azimuthal system is installed on a tripod, and an equatorial system is installed on it, in which the telescope is already mounted. This design allows you to use the capabilities of both types of mounts. Thus, the azimuthal mechanism is quite suitable for observing large celestial bodies in near space (the Moon, planets) and large areas of the sky (such as constellations), and it does not require complex preliminary settings. And for astrophotography or for viewing deep space objects at high magnifications, it is more convenient to use the equatorial system. However, in practice, such versatility is extremely rarely required, despite the fact that the combination of two types of mounts complicates the design, increases its cost and reduces reliability. So this option can be found in single models of telescopes.
- Without a mount. The complete absence of a mounting system in the kit does not allow using the telescope out of the box. However, it can be the best option in some cases. The first is if the customer wants to choose the mount at his own discretion, without relying on the manufacturer's decision, or even assemble it himself (for example, quite a lot of astronomers make their own Dobsonian systems). The second typical case is if the household already has a mount (for example, from an old telescope that has fallen into disrepair), and there is simply no need to overpay for a second one. In any case, when choosing such a model, you should pay special attention to the type of fastening for which the pipe is designed - compatibility with a specific mount directly depends on it.
A mount is a mechanical unit with which the telescope is attached to a tripod or (in some cases) installed directly on the ground. In addition to mounting, this unit is also responsible for pointing the optics at a certain point in the sky. The most popular nowadays are azimuth devices in different variations - AZ1, AZ2, AZ3, as well as in the form of the so-called Dobson mount. Equatorial mechanisms of different models ( EQ1, EQ2, EQ3, EQ4, EQ5) are noticeably more complex and more expensive, but they provide more possibilities. There are systems that combine both of these types of mounts at once - the so-called azimuth-equatorial ones. And finally, some telescopes are supplied without a mount at all. Here's a more detailed description of these options:
- Azimuthal. The full name is “alt-azimuth”. Traditionally, it has two axes of rotation of the telescope - one for pointing in altitude, the second in azimuth. Different models of such mounts differ in additional control capabilities:
- AZ1. They d...o not have a precision movement system.
- AZ2. Equipped with a system of precise vertical movement (around the horizontal axis).
- AZ3. Equipped with precision movement systems on both axes.
- Dobson. A specific variation of the alt-azimuth mounts described above, used almost exclusively in reflectors. It also provides two axes of rotation - horizontal and vertical. The key feature of the Dobsonian mount is that it is not designed for a tripod and is mounted directly on the ground or other flat surface; For this purpose, the design provides a wide, massive base. Such systems are excellent for Newtonian telescopes, in which the eyepiece is located in the front part: thanks to the low position of the tube on the mount, the eyepiece itself is at a fairly convenient height. Also, the advantages of “Dobsons” include simplicity, low cost and at the same time good reliability, making them suitable even for large and heavy telescopes. Among the disadvantages, we should note the poor compatibility with uneven surfaces, especially hard ones, like solid rock (while tripods used with other types of mounts do not have this disadvantage).
- Equatorial. Mounts of this type make it possible to synchronize the movement of the telescope with the movement of celestial bodies across the sky, resulting from the rotation of the Earth. The conventional vertical axis, responsible for rotating the telescope from side to side, in such mechanisms is called the right ascension axis (RA), and the horizontal (for pointing along the conventional vertical) is called the declination axis (Dec.). Before use, the equatorial mount is adjusted so that the right ascension axis is directed to the “celestial pole”, parallel to the axis of rotation of the Earth (“the celestial axis”); the specific inclination relative to the vertical depends on the geographic latitude of the observation site. This format of work significantly complicates both the design of the mount itself and the installation procedure. On the other hand, equatorial systems are ideal for long-term “accompaniment” of astronomical objects: in order to compensate for the movement of a celestial body due to the rotation of the Earth and keep the target in the field of view, it is enough to rotate the telescope around the RA axis to the right (clockwise), and with a clearly defined speed - 15° per hour, regardless of the vertical position of the object. This makes such designs ideal for astrophotography, including deep space objects that require long exposures. In fact, this does not even require a full-fledged auto-tracking system - a relatively simple clock mechanism that rotates the telescope around the right ascension axis is enough. The downside of these advantages, in addition to the mentioned complexity and high cost, is their poor suitability for large, heavy telescopes - as the weight of the instrument increases, the weight of a suitable equatorial system increases even faster.
As for the different models of such mounts, they are marked with an alphanumeric index, from EQ1 to EQ5. In general, the higher the number in the designation, the larger and heavier the structure itself (including the tripod, if supplied), the less suitable it is for moving from place to place, but the better it dampens vibrations and shocks. But the restrictions on the weight of the telescope are not directly related to the equatorial mount model.
— Azimuthally-equatorial. Mechanisms that combine two types of mounts. It looks like this: an azimuthal system is installed on a tripod, and an equatorial system is installed on it, in which the telescope is already mounted. This design allows you to use the capabilities of both types of mounts. Thus, the azimuthal mechanism is quite suitable for observing large celestial bodies in near space (the Moon, planets) and large areas of the sky (such as constellations), and it does not require complex preliminary settings. And for astrophotography or for viewing deep space objects at high magnifications, it is more convenient to use the equatorial system. However, in practice, such versatility is extremely rarely required, despite the fact that the combination of two types of mounts complicates the design, increases its cost and reduces reliability. So this option can be found in single models of telescopes.
- Without a mount. The complete absence of a mounting system in the kit does not allow using the telescope out of the box. However, it can be the best option in some cases. The first is if the customer wants to choose the mount at his own discretion, without relying on the manufacturer's decision, or even assemble it himself (for example, quite a lot of astronomers make their own Dobsonian systems). The second typical case is if the household already has a mount (for example, from an old telescope that has fallen into disrepair), and there is simply no need to overpay for a second one. In any case, when choosing such a model, you should pay special attention to the type of fastening for which the pipe is designed - compatibility with a specific mount directly depends on it.
Lens diameter
Telescope objective diameter; this parameter is also called "aperture". In refractor models (see "Design"), it corresponds to the diameter of the entrance lens, in models with a mirror (see ibid.), it corresponds to the diameter of the main mirror. Anyway, the larger the aperture, the more light enters the lens, the higher (ceteris paribus) the aperture ratio of the telescope and its magnification indicators (see below), and the better it is suitable for working with small, dim or distant astronomical objects (primarily photographing them). On the other hand, with the same type of construction, a larger lens is more expensive. Therefore, when choosing for this parameter, it is worth proceeding from the real needs and features of the application. For example, if you do not plan to observe and shoot remote (“deep-sky”) objects, there is no need to chase high aperture. In addition, do not forget that the actual image quality depends on many other indicators.
Designing and manufacturing large lenses is not an easy and expensive task, but mirrors can be made quite large without a significant increase in cost. Therefore, consumer-grade refracting telescopes are practically not equipped with lenses with a diameter of more than 150 mm, but among reflector-type instruments, indicators of 100-150 mm correspond to the average level, while in the most advanced models this figure can exceed 400 mm.
Designing and manufacturing large lenses is not an easy and expensive task, but mirrors can be made quite large without a significant increase in cost. Therefore, consumer-grade refracting telescopes are practically not equipped with lenses with a diameter of more than 150 mm, but among reflector-type instruments, indicators of 100-150 mm correspond to the average level, while in the most advanced models this figure can exceed 400 mm.
Focal length
The focal length of the telescope lens.
Focal length — this is the distance from the optical centre of the lens to the plane on which the image is projected (screen, film, matrix), at which the telescope lens will produce the clearest possible image. The longer the focal length, the greater the magnification the telescope can provide; however, keep in mind that magnification figures are also related to the focal length of the eyepiece used and the diameter of the lens (see below for more on this). But what this parameter directly affects is the dimensions of the device, more precisely, the length of the tube. In the case of refractors and most reflectors (see "Design"), the length of the telescope approximately corresponds to its focal length, but in mirror-lens models they can be 3-4 times shorter than the focal length.
Also note that the focal length is taken into account in some formulas that characterize the quality of the telescope. For example, it is believed that for good visibility through the simplest type of refracting telescope — the so-called achromat — it is necessary that its focal length is not less than D ^ 2/10 (the square of the lens diameter divided by 10), and preferably not less than D ^ 2/9.
Max. useful magnification
The highest useful magnification that the telescope can provide.
The actual magnification of the telescope depends on the focal lengths of the objective (see above) and the eyepiece. Dividing the first by the second, we get the degree of magnification: for example, a system with a 1000 mm objective and a 5 mm eyepiece will give 1000/5 = 200x (in the absence of other elements that affect the magnification, such as a Barlow lens — see below). Thus, by installing different eyepieces in the telescope, you can change the degree of its magnification. However, increasing the magnification beyond a certain limit simply does not make sense: although the apparent size of objects will increase, their detail will not improve, and instead of a small and clear image, the observer will see a large, but blurry one. The maximum useful magnification is precisely the limit above which the telescope simply cannot provide normal image quality. It is believed that, according to the laws of optics, this indicator cannot be more than the diameter of the lens in millimetres, multiplied by two: for example, for a model with an entrance lens of 120 mm, the maximum useful magnification will be 120x2 = 240x.
Note that working at a given degree of multiplicity does not mean the maximum quality and clarity of the image, but in some cases it can be very convenient; see “Maximum resolution magnification"
Max. resolution magnification
The highest resolution magnification that a telescope can provide. In fact, this is the magnification at which the telescope provides maximum detail of the image and allows you to see all the small details that, in principle, it is possible to see in it. When the magnification is reduced below this value, the size of visible details decreases, which impairs their visibility, when magnified, diffraction phenomena become noticeable, due to which the details begin to blur.
The maximum resolving magnification is less than the maximum useful one (see above) — it is somewhere around 1.4 ... 1.5 of the lens diameter in millimetres (different formulas give different values, it is impossible to determine this value unambiguously, since much depends on the subjective sensations of the observer and features of his vision). However, it is worth working with this magnification if you want to consider the maximum amount of detail — for example, irregularities on the surface of the Moon or binary stars. It makes sense to take a larger magnification (within the maximum useful one) only for viewing bright contrasting objects, and also if the observer has vision problems.
The maximum resolving magnification is less than the maximum useful one (see above) — it is somewhere around 1.4 ... 1.5 of the lens diameter in millimetres (different formulas give different values, it is impossible to determine this value unambiguously, since much depends on the subjective sensations of the observer and features of his vision). However, it is worth working with this magnification if you want to consider the maximum amount of detail — for example, irregularities on the surface of the Moon or binary stars. It makes sense to take a larger magnification (within the maximum useful one) only for viewing bright contrasting objects, and also if the observer has vision problems.
Min. magnification
The smallest magnification that the telescope provides. As in the case of the maximum useful increase (see above), in this case we are not talking about an absolutely possible minimum, but about a limit beyond which it makes no sense from a practical point of view. In this case, this limit is related to the size of the exit pupil of the telescope — roughly speaking, a speck of light projected by the eyepiece onto the observer's eye. The lower the magnification, the larger the exit pupil; if it becomes larger than the pupil of the observer's eye, then part of the light, in fact, does not enter the eye, and the efficiency of the optical system decreases. The minimum magnification is the magnification at which the diameter of the exit pupil of the telescope is equal to the size of the pupil of the human eye at night (7 – 8 mm); this parameter is also called "equipupillary magnification". Using a telescope with eyepieces that provide lower magnification values is considered unjustified.
Usually, the formula D/7 is used to determine the equal-pupillary magnification, where D is the diameter of the lens in millimetres (see above): for example, for a model with an aperture of 140 mm, the minimum magnification will be 140/7 = 20x. However, this formula is valid only for night use; when viewed during the day, when the pupil in the eye decreases in size, the actual values of the minimum magnification will be larger — on the order of D / 2.
Usually, the formula D/7 is used to determine the equal-pupillary magnification, where D is the diameter of the lens in millimetres (see above): for example, for a model with an aperture of 140 mm, the minimum magnification will be 140/7 = 20x. However, this formula is valid only for night use; when viewed during the day, when the pupil in the eye decreases in size, the actual values of the minimum magnification will be larger — on the order of D / 2.
Aperture
The luminosity of a telescope characterizes the total amount of light "captured" by the system and transmitted to the observer's eye. In terms of numbers, aperture is the ratio between the diameter of the lens and the focal length (see above): for example, for a system with an aperture of 100 mm and a focal length of 1000 mm, the aperture will be 100/1000 = 1/10. This indicator is also called "relative aperture".
When choosing according to aperture ratio, it is necessary first of all to take into account for what purposes the telescope is planned to be used. A large relative aperture is very convenient for astrophotography, because allows a large amount of light to pass through and allows you to work with faster shutter speeds. But for visual observations, high aperture is not required — on the contrary, longer-focus (and, accordingly, less aperture) telescopes have a lower level of aberrations and allow the use of more convenient eyepieces for observation. Also note that a large aperture requires the use of large lenses, which accordingly affects the dimensions, weight and price of the telescope.
When choosing according to aperture ratio, it is necessary first of all to take into account for what purposes the telescope is planned to be used. A large relative aperture is very convenient for astrophotography, because allows a large amount of light to pass through and allows you to work with faster shutter speeds. But for visual observations, high aperture is not required — on the contrary, longer-focus (and, accordingly, less aperture) telescopes have a lower level of aberrations and allow the use of more convenient eyepieces for observation. Also note that a large aperture requires the use of large lenses, which accordingly affects the dimensions, weight and price of the telescope.
Penetrating power
The penetrating power of a telescope is the magnitude of the faintest stars that can be seen through it under perfect viewing conditions (at the zenith, in clear air). This indicator describes the ability of the telescope to see small and faintly luminous astronomical objects.
When evaluating the capabilities of a telescope in terms of this indicator, it should be taken into account that the brighter the object, the smaller its magnitude: for example, for Sirius, the brightest star in the night sky, this indicator is -1, and for the much dimmer Polar Star — about 2. The largest magnitude visible to the naked eye is about 6.5.
Thus, the larger the number in this characteristic, the better the telescope is suitable for working with dim objects. The humblest modern models can see stars around magnitude 10, and the most advanced consumer-level systems are capable of viewing at magnitudes greater than 15—nearly 4,000 times fainter than the minimum for the naked eye.
Note that the actual penetrating power is directly related to the magnification factor. It is believed that telescopes reach their maximum in this indicator when using eyepieces that provide a magnification of the order of 0.7D (where D is the objective diameter in millimetres).
Resolution (Dawes)
The resolution of the telescope, determined according to the Dawes criterion. This indicator is also called the Dawes limit. (There is also a reading of "Daves", but it is not correct).
Resolution in this case is an indicator that characterizes the ability of a telescope to distinguish individual light sources located at a close distance, in other words, the ability to see them as separate objects. This indicator is measured in arc seconds (1 '' is 1/3600 of a degree). At distances smaller than the resolution, these sources (for example, double stars) will merge into a continuous spot. Thus, the lower the numbers in this paragraph, the higher the resolution, the better the telescope is suitable for looking at closely spaced objects. However, note that in this case we are not talking about the ability to see objects completely separate from each other, but only about the ability to identify two light sources in an elongated light spot that have merged (for the observer) into one. In order for an observer to see two separate sources, the distance between them must be approximately twice the claimed resolution.
According to the Dawes criterion, the resolution directly depends on the diameter of the telescope lens (see above): the larger the aperture, the smaller the angle between separately visible objects can be and the higher the resolution. In general, this indicator is similar to the Rayleigh criterion (see "Resolution (Rayleigh)"), however, i...t was derived experimentally, and not theoretically. Therefore, on the one hand, the Dawes limit more accurately describes the practical capabilities of the telescope, on the other hand, the correspondence to these capabilities largely depends on the subjective characteristics of the observer. Simply put, a person without experience in observing double objects, or having vision problems, may simply “not recognize” two light sources in an elongated spot if they are located at a distance comparable to the Dawes limit. For more on the difference between the criteria, see "Resolution (Rayleigh)".
Resolution (Rayleigh)
The resolution of the telescope, determined according to the Rayleigh criterion.
Resolution in this case is an indicator that characterizes the ability of a telescope to distinguish individual light sources located at a close distance, in other words, the ability to see them as separate objects. This indicator is measured in arc seconds (1 '' is 1/3600 of a degree). At distances smaller than the resolution, these sources (for example, double stars) will merge into a continuous spot. Thus, the lower the numbers in this paragraph, the higher the resolution, the better the telescope is suitable for looking at closely spaced objects. However, note that in this case we are not talking about the ability to see objects completely separate from each other, but only about the ability to identify two light sources in an elongated light spot that have merged (for the observer) into one. In order for an observer to see two separate sources, the distance between them must be approximately twice the claimed resolution.
The Rayleigh criterion is a theoretical value and is calculated using rather complex formulas that take into account, in addition to the diameter of the telescope lens (see above), the wavelength of the observed light, the distance between objects and to the observer, etc. Separately visible, according to this method, are objects located at a greater distance from each other than for the Dawes limit described above; therefore, for the same tel...escope, the Rayleigh resolution will be lower than that of Dawes (and the numbers indicated in this paragraph are correspondingly larger). On the other hand, this indicator depends less on the personal characteristics of the user: even inexperienced observers can distinguish objects at a distance corresponding to the Rayleigh criterion.
Lens shielding (by diameter)
The diameter of the space in the field of view of the telescope, closed by any structural element.
Shielding is found exclusively in models with mirrors (reflectors and mirror-lens, see "Design"): the features of their device are such that any auxiliary element (for example, a mirror that directs light into the eyepiece) is certainly located in the path of light entering the lens and covers part of it. Diameter shielding is indicated as a percentage of the telescope lens size (see above): d/D*100%, where d is the shield diameter, D is the lens diameter. This indicator is also called "linear shielding factor".
A foreign object in the field of view can interfere with observation — for example, in the form of a dark spot when pointing the telescope exactly at the light source. However, a much more serious drawback is the noticeable decrease in contrast associated with the diffraction of light around the screen, and, accordingly, the deterioration of image quality. The linear shielding factor is the main indicator of how much the screen affects the quality of the “picture”: values up to 25% are considered good, up to 30% acceptable, up to 40% tolerable, and shielding more than 40% in diameter leads to serious distortion.
Lens shielding (by area)
The area of space in the field of view of the telescope, closed by some structural element.
Shielding is found exclusively in models with mirrors (reflectors and mirror-lens, see "Design"): the features of their device are such that any auxiliary element (for example, a diagonal mirror, see below) is certainly located in the path of light entering the lens and covers part of it. A foreign object in the field of view can interfere with observation — for example, in the form of a dark spot when pointing the telescope exactly at the light source. However, a much more serious drawback is the noticeable decrease in contrast associated with the diffraction of light around the screen, and, accordingly, the deterioration of image quality. At the same time, the larger the screen, the stronger the impact on the quality of the “picture”.
Area shielding is indicated as a percentage of the total lens area: s/S*100, where s is the screen area, S is the lens area. This parameter is used in fact much less frequently than the screening by diameter described above, because the dependence of image quality on the screen area is described by more complex formulas, and the area itself is more difficult to determine. Also note that some manufacturers or sellers may use area screening data for marketing purposes. For example, for a telescope with 30% shielding in diameter, the shielding in area will be only 9%; the second digit creates a deceptive impression of a small screen...size, while in fact it is quite large and already noticeably affects the contrast and image quality.
Finder
The type of finder provided in the design of the telescope.
A seeker is a device designed to point the device at a specific celestial object. The need for such a device is due to the fact that telescopes, due to the high magnification, have very small viewing angles, which greatly complicates visual guidance: such a small area of \u200b\u200bthe sky is visible in the eyepiece that it is possible to determine from these data exactly where the telescope is pointed and where it needs to be turning around is almost impossible. Pointing "on the tube" is very inaccurate, especially in the case of mirror models that have a large thickness and relatively short length. The seeker, on the other hand, has a low magnification (or works without magnification at all) and, accordingly, wide viewing angles, thus playing the role of a kind of “sight” for the main optical system of the telescope.
The following types of finders can be used in modern telescopes:
— Optical. Most often, such finders look like a small monocular directed parallel to the optical axis of the telescope. In the field of view of the monocular, markings are usually applied, showing which point in the visible space corresponds to the field of view of the telescope itself. In most cases, optical finders also provide a certain magnification — usually on the order of 5 – 8x, so when working with such systems, usually, the initial pointing of the telescope "...on the tube" is still required. The advantages of optics, as compared to LED finders, are the simplicity of design, low cost, and good suitability for observations in the city, suburbs, and other conditions with fairly bright skies. In addition, such devices do not depend on power sources. Against the background of a dark sky, the markings may be poorly visible, but for such cases there is a specific kind of finders — with an illuminated crosshair. However the backlight requires batteries, but even in the absence of them, the markings remain visible — as in a conventional, non-illuminated finder. Devices of this type are indicated by an index traditional for optics of two numbers, the first of which corresponds to the multiplicity, the second to the diameter of the lens — for example, 5x24.
— With point guidance (LED). This type of seekers is similar in principle to collimator sights: an obligatory design element is a viewing window (in the form of a characteristic glass in a frame), onto which a mark is projected from a light source. This mark can look like a dot or another shape — crosshairs, rings with a dot, etc. The device of such a finder is such that the position of the mark in the window depends on the position of the observer's eye, but this mark always points to the point at which the telescope is pointed. LED finders are more convenient than optical ones in the sense that the user does not have to bring the eye close to the eyepiece — the mark is well visible at a distance of 20 – 30 cm, which makes it easier to point in some situations (for example, if the observed object is located close to the zenith). In addition, such devices are great for working with dark skies. They usually do not have magnification, but this cannot be called a clear disadvantage — for a seeker, a wide field of view is often more important than zoom. But from the unambiguous practical shortcomings, it is worth noting the need for a power source (usually batteries) — without them, the system turns into a useless piece of glass. In addition, collimators as a whole are noticeably more expensive than classical optics, and the mark may be lost against the background of an illuminated sky.
Note that there are telescopes that do not have seekers at all — these are models with a small objective diameter, in which the minimum magnification (see above) is small and provides a fairly wide field of view.
Focuser
The type of focuser (mechanical unit responsible for focus the image) provided in the design of the telescope. The focus procedure involves moving the eyepiece of the telescope relative to the lens; different types of focusers differ in the type of mechanism that provides such movement.
— Rack. As the name suggests, these focusers use a rack and pinion mechanism that is moved by turning a pinion gear; and this gear, in turn, is connected to the focus knob. The main advantages of rack systems are simplicity and low cost. At the same time, such mechanisms are not very accurate, moreover, they often have backlashes. In this regard, focusers of this type are typical mainly for low-cost entry-level telescopes.
— Crayford. Focusers of the Crayford system use roller mechanisms in which there are no teeth, and the movement of the eyepiece is carried out due to the friction force between the roller and the moving surface. They are considered much more advanced than rack and pinion — in particular, due to the absence of backlash and smooth focus. The only serious drawback of "crayfords" can be called a certain probability of slippage; however, due to the use of special materials and other design tricks, this probability is practically reduced to zero. Due to this, this type of focuser is found even in the most advanced professional-level telescopes.
— Threaded. The design of the threaded focuser is based on two tubes...— one is inserted into the other and seated on the thread. The movement of the eyepiece necessary for focus is carried out by rotation around the longitudinal axis — similar to how a screw moves in a thread. Such focusers are extremely simple and inexpensive, but they are subject to noticeable backlash and require regular lubrication. In addition, they are rather inconvenient for astrophotography: when adjusting the focus, you have to rotate the camera connected to the eyepiece. Therefore, this kind of focus mechanisms is quite rare, mainly in small and relatively inexpensive telescopes.
Eyepieces
This item indicates the eyepieces included in the standard scope of delivery of the telescope, or rather, the focal lengths of these eyepieces.
Having these data and knowing the focal length of the telescope (see above), it is possible to determine the magnifications that the device can produce out of the box. For a telescope without Barlow lenses (see below) and other additional elements of a similar purpose, the magnification will be equal to the focal length of the objective divided by the focal length of the eyepiece. For example, a 1000 mm optic equipped with 5 and 10 mm "eyes" will be able to give magnifications of 1000/5=200x and 1000/10=100x.
In the absence of a suitable eyepiece in the kit, it can usually be purchased separately.
Eyepiece bore diameter
The size of the “seat” for the eyepiece, provided in the design of the telescope. Modern models use sockets of standard sizes — most often 0.96", 1.25" or 2".
This parameter is useful, first of all, if you want to buy eyepieces separately: their bore diameter must match the characteristics of the telescope. However, 2" sockets allow the installation of 1.25" eyepieces through a special adapter, but the reverse option is not possible. Note that telescopes with a rim diameter of 2 "are considered the most advanced, because in addition to eyepieces, many additional accessories (distortion correctors, photo adapters, etc.) are produced for this size, and 2" eyepieces themselves provide a wider field of view (although they are more expensive). In turn, "eyes" at 1.25 "are used in relatively inexpensive models, and at 0.96" — in the simplest entry-level telescopes with small lenses (usually up to 50 mm).
This parameter is useful, first of all, if you want to buy eyepieces separately: their bore diameter must match the characteristics of the telescope. However, 2" sockets allow the installation of 1.25" eyepieces through a special adapter, but the reverse option is not possible. Note that telescopes with a rim diameter of 2 "are considered the most advanced, because in addition to eyepieces, many additional accessories (distortion correctors, photo adapters, etc.) are produced for this size, and 2" eyepieces themselves provide a wider field of view (although they are more expensive). In turn, "eyes" at 1.25 "are used in relatively inexpensive models, and at 0.96" — in the simplest entry-level telescopes with small lenses (usually up to 50 mm).
Lens Barlow
The magnification of the Barlow lens supplied with the telescope.
Such a device (usually, it is made removable) is a diverging lens or lens system installed in front of the eyepiece. In fact, the Barlow lens increases the focal length of the telescope, providing a greater degree of magnification (and a smaller angle of view) with the same eyepiece. In this case, the magnification factor with a lens can be calculated by multiplying the “native” magnification with a given eyepiece by the magnification of the lens itself: for example, if a telescope with a 10 mm eyepiece provided a magnification of 100x, then when installing a 3x Barlow lens, this figure will be 100x3=300x. Of course, the same effect can be achieved with an eyepiece with a reduced focal length. However, firstly, such an eyepiece may not always be available for purchase; secondly, one Barlow lens can be used with all eyepieces suitable for the telescope, expanding the arsenal of available magnifications. This possibility is especially convenient in those cases when the observer needs an extensive set of options for the degree of magnification. For example, a set of 4 eyepieces and one Barlow lens provides 8 magnification options, while working with such a set is more convenient than with 8 separate eyepieces.
Such a device (usually, it is made removable) is a diverging lens or lens system installed in front of the eyepiece. In fact, the Barlow lens increases the focal length of the telescope, providing a greater degree of magnification (and a smaller angle of view) with the same eyepiece. In this case, the magnification factor with a lens can be calculated by multiplying the “native” magnification with a given eyepiece by the magnification of the lens itself: for example, if a telescope with a 10 mm eyepiece provided a magnification of 100x, then when installing a 3x Barlow lens, this figure will be 100x3=300x. Of course, the same effect can be achieved with an eyepiece with a reduced focal length. However, firstly, such an eyepiece may not always be available for purchase; secondly, one Barlow lens can be used with all eyepieces suitable for the telescope, expanding the arsenal of available magnifications. This possibility is especially convenient in those cases when the observer needs an extensive set of options for the degree of magnification. For example, a set of 4 eyepieces and one Barlow lens provides 8 magnification options, while working with such a set is more convenient than with 8 separate eyepieces.
Relay lens
The magnification of the inverting lens supplied with the telescope.
Without the use of such a lens, the telescope, usually, produces an inverted image of the object under consideration. In astronomical observations and astrophotography, this is in most cases not critical, but when considering terrestrial objects, such a position of the “image” causes serious inconvenience. The inverting lens provides a flip of the image, allowing the observer to see the true (not inverted, not mirrored) position of objects in the field of view. This function is found mainly in relatively simple telescopes with a low magnification factor and a small lens size — they are considered the most suitable for ground-based observations. Note that, in addition to "clean" lenses, there are also inverting systems based on prisms.
As for the magnification, it is very small and usually ranges from 1x to 1.5x — this minimizes the impact on image quality (and it is more convenient to increase the overall magnification in other ways — for example, using the Barlow lenses described above).
Enlightenment coating
The presence of an antireflection coating on the surface of the lenses, and sometimes also the prisms of the telescope. Such a coating creates characteristic coloured reflections or iridescent stains on the glass surface.
The meaning of enlightenment is clear from the name: this feature improves the overall light transmission, thus providing a brighter, clearer and higher quality image. For telescopes, this is especially important, since such instruments are used mainly at night and deal with very little light. The general principle behind AR coatings is that they reduce the reflectance of a lens/prism, allowing more light to pass through. In fact, this is implemented as follows: light passes through the coating to the main glass, is reflected from it, but instead of being scattered, it reaches the boundary between the coating and air and is already reflected from it, turning “back” in the original direction. Similarly, it is possible to reduce light loss by reflection from 5% (uncoated lens) to 1% with single-coated and 0.2% or even less with multi-coated; at the same time, due to the microscopic thickness, such coatings do not introduce geometric distortions in the visible image.
Usually, the type of enlightenment is additionally specified in the manufacturer's documentation, and sometimes directly in the characteristics. There are 4 main types in total, here are their main features:
— Single layer (C). One layer of coating on individ...ual (not all) optical elements, and most often only on the outer surface of the lens. This is the simplest and most inexpensive option, used mainly in inexpensive models that are not designed for serious tasks. This is due to the fact that, in general, single-layer enlightenment acts only on a part of the visible spectrum, which is why it is inferior to a multi-layer coating both in terms of efficiency and colour fidelity (sometimes colour distortions can be quite noticeable). And in this case, such a coating is also not applied to everything, but only to individual parts of the optical system. So although single-layer enlightenment is better than none at all, it is suitable mainly for entertainment applications.
— Full single layer (FC). Single-layer coating applied to all optical elements of the telescope. It gives the maximum efficiency available for such coatings in principle. However, since this type of coating is effective only for a relatively small part of the visible spectrum, the quality of colour reproduction is still lower than in multilayer systems.
— Multilayer (MC). Coating of several layers with different refractive indices applied to one or more optical elements (but not all). The number of layers can be different — from 2 – 3 in relatively inexpensive solutions to 6 – 8 or more in high-end telescopes. However, even relatively simple multilayer coatings cover almost the entire visible spectrum and are several times superior to single-layer coatings in terms of reflection reduction. So if good brightness and reliable colour reproduction are important to you, then this option will be more preferable than even full single-layer enlightenment, not to mention incomplete. On the other hand, such optics are more expensive than solutions with a single layer of antireflection coating.
— Full multilayer. The most advanced type of coating: a multi-layer coating applied to all elements of the optical system. This option provides extremely high light transmission and true colour reproduction, but it comes at a cost. Therefore, it can be found mainly among high-end telescopes; and it’s worth looking specifically for a model with such enlightenment when both the brightness of the picture and the reliability of colours are of fundamental importance to you.
Solar filter
The presence of a solar filter in the scope of delivery of the telescope.
The purpose of this accessory is already reflected in the name: it is designed for safe observations of the Sun. It is strictly forbidden to look at “our native luminary” through an unprotected telescope: even a short look into the eyepiece can lead to irreversible damage to the eye, besides, the optics themselves quickly overheat and can fail. Thus, special filters are used that transmit very little light — hundredths or even thousandths of a percent; in the case of the Sun, this is quite sufficient for normal visibility, while observation becomes quite safe.
Most modern telescopes are equipped with filters that are worn on the lens — they protect both the eye from burns and the device itself from overheating. There are also eyepiece filters — they are more compact and cheaper, but they do not provide protection for the optics and are themselves prone to rapid overheating and failure. The specific type of accessory should be specified according to the manufacturer's documentation, and sometimes this can even be done from product photos.
Moon filter
Availability of a lunar filter as standard equipment of the telescope.
This useful accessory reduces the brightness and contrast of the light coming from the Moon, allowing the observer to get a clearer image of the surface of the Earth's satellite. Moon filters usually have different degrees of darkness and are available in various designs (neutral gray, green, polarizing, etc.). The choice of a specific option depends on the observation conditions and user preferences.
Using a lunar filter allows you to more comfortably and in detail study various features of the moon's surface, such as craters, mountains and valleys, by preventing excessive illumination and softening contrast. Most modern telescopes are equipped with filters that are placed on the lens; eyepiece filters are also available - they are more compact and cheaper.
Mirror
The type of mirror installed in a reflector or combined model (see “Design”).
Let us recall that the mirror in such models performs the same function as the objective lens in classical refracting telescopes - that is, it is directly responsible for magnifying the image. The type of mirror is indicated by its general shape:
- Spherical. The most common option, which is primarily due to ease of production and, as a consequence, low cost. On the other hand, a spherical mirror, purely technically, is not capable of concentrating a beam of light as effectively as a parabolic one does. This causes distortions known as spherical aberrations; they can lead to a noticeable deterioration in sharpness, and this effect becomes most noticeable at high magnifications. True, there are telescopes that are practically not susceptible to this phenomenon - namely, long-focus models in which the focal length is 8 to 10 times the size of the mirror; however, such devices are bulky and heavy. In light of this, it is worth specifically looking for models with this type of mirrors mainly in two cases: either if the telescope is planned to be used at a relatively small magnification (for example, for observing the Moon, planets, constellations), or if you are not bothered by the dimensions and weight.
— Parabolic. Mirrors in the shape of a paraboloid of rotation almost perfectly concentrate the rays entering the telescope at the desi...red point in the optical system. Thanks to this, reflectors with such equipment provide a very clear image even at high magnification levels and regardless of the focal length. The main disadvantage of this type of mirror is the rather high cost associated with the complexity of production. So it makes sense to pay attention to parabolic reflectors primarily when the described advantages clearly outweigh; A typical example is the search for a relatively compact telescope for observing deep space objects.
Diagonal mirror
The presence of a diagonal mirror in the design or scope of delivery of the telescope.
This accessory is used in combination with lens and mirror-lens telescopes (see "Design"). In such models, the eyepiece is located at the end of the tube and is directed along the optical axis of the telescope; in some situations — for example, when observing objects near the zenith — such an arrangement can be very inconvenient for the observer. The diagonal mirror allows you to direct the eyepiece at an angle to the optical axis, which provides comfort in the situations mentioned. However the image usually turns out to be mirrored (from right to left), however, when observing astronomical objects, this can hardly be called a serious drawback. Diagonal mirrors can be both removable and built-in, it can also be possible to change the angle of rotation of the eyepiece.
This accessory is used in combination with lens and mirror-lens telescopes (see "Design"). In such models, the eyepiece is located at the end of the tube and is directed along the optical axis of the telescope; in some situations — for example, when observing objects near the zenith — such an arrangement can be very inconvenient for the observer. The diagonal mirror allows you to direct the eyepiece at an angle to the optical axis, which provides comfort in the situations mentioned. However the image usually turns out to be mirrored (from right to left), however, when observing astronomical objects, this can hardly be called a serious drawback. Diagonal mirrors can be both removable and built-in, it can also be possible to change the angle of rotation of the eyepiece.
Corrector
The presence of a coma corrector in the scope of delivery of the telescope.
Coma is a special type of distortion (aberration) to which the reflectors of the Newtonian system are mainly subject. Coma leads to the fact that at the edges of the image, point sources of light (primarily stars) begin to blur and become similar to comets, whose tails are directed from the centre of the image; and the greater the distance from this centre, the stronger the lubrication. This is not particularly critical for observations, but it can noticeably "ruin the life" of an astrophotographer — especially since it is desirable to use fast telescopes for shooting, and an increase in aperture leads to an increase in coma.
Correctors are used to eliminate this phenomenon. Such devices are lenses of a special design, installed behind the main mirror (when viewed in the direction of the light). At the same time, if the elimination of coma is fundamentally important for you, it is best to purchase a telescope that was originally supplied with a similar lens: it will guarantee that the telescope is compatible with the corrector in principle, and will also save you the hassle of finding and selecting such an accessory.
Electronic control
The presence of electronic control in the design of the telescope.
This function is indicated for models that have the ability to control the telescope from the remote control and are standardly equipped with such remote controls. Usually, such control allows you to point the telescope from the remote control, and in some models an electric drive of the focuser may also be provided (which is very convenient for astrophotography). Anyway, electronic control provides additional features and can make working with the telescope more comfortable and efficient, but it significantly affects the cost and depends on power sources (usually batteries are used).
Note that there are quite a few motorized telescopes that are not equipped with a remote control. Formally, they do not apply to models with electronic control, but they support it — only the remote control needs to be purchased separately. Therefore, before buying a telescope where electronic control is not claimed, it makes sense to separately clarify whether it is compatible with the remote control — especially if the chosen model is noticeably more expensive than analogues without obvious advantages in terms of performance.
Auto-guidance
The presence of an auto -guidance system in the design of the telescope.
Such a system (also called "Go-To") allows you to automatically direct the telescope lens to a point in the sky with certain coordinates: just set these coordinates in the system and start auto-guidance. This is much more convenient and reliable than searching for the required point manually. Also note that many such systems have built-in catalogs of celestial bodies, which makes it even easier to detect certain objects. The main disadvantages of such telescopes are traditional — high cost and need for power.
The auto-guidance function is found only in models with electronic control (or support for such control — see above for details); note that its presence, by definition, means support for autotracking (see below).
Autotracking
The presence of the auto-tracking function in the telescope.
This function allows the telescope to "lead" the selected object across the sky, constantly keeping it in the field of view. It is important primarily for astrophotography, when long exposures are used; during the exposure time, the object being photographed can travel a rather long distance across the sky (due to the rotation of the Earth), as a result, with a stationary telescope, the image is blurry. Auto-tracking avoids such troubles. There are other options for using this function — for example, during long-term observations of the same object, so as not to look for it again every time.
In models with an azimuth mount (see “Mounting”), auto-tracking is only possible if the electronic control and auto-guidance systems (see above) are available. But when using an equatorial mount, these systems are not necessary: in such cases, the rotation of the telescope during tracking is carried out only around one axis, and evenly, and this movement can be provided by a simple electric motor or even a clockwork.
Active cooling
Active cooling systems are called those that provide forced heat removal (in addition to natural phenomena — convection, heat transfer and radiation). A classic example of such a system is a fan, such devices are traditionally installed in telescopes, supplemented with active cooling.
For the highest quality image, the telescope must have the same temperature as the environment — otherwise distortion may occur (due to heating of the boundary layer of air near the lens, mirror and other surfaces). However, cooling down naturally can take a long time; besides, at the same time, it is the boundary layer of air that is the most critical for a high-quality picture, which cools the slowest. Active cooling allows you to correct the situation and significantly speed up the process: the fan, among other things, “blows off” the boundary layer, replacing it with cold outside air. Note that it makes sense to use such systems only in reflectors and combined telescopes; but refractors, firstly, cool down noticeably faster, and secondly, they often have closed tubes, which in principle are not suitable for installing fans.
Paying attention to models with active cooling makes sense, first of all, when the telescope is planned to be kept warm (for example, in an apartment) and used outdoors during the cold season. For example, with a temperature gradient (difference) of 30 °C (+20 °C in the house, -10 °C outside), the natural cooling t...ime of the device can vary from more than 40 minutes to almost 10 hours, depending on the design features. Waiting all this time in the cold is a dubious pleasure. On the other hand, a special cooling system inevitably increases the cost of the device; the majority of users are still engaged in observations in a more or less warm season; and fans for telescopes are also available as separate devices that can be purchased if necessary. As a result, there are few models that initially have such equipment nowadays.
camera mount
The ability to install a camera allows you to use the telescope for astrophotography without making additional changes to the design.
To mount the camera in telescopes, a standard “T-mount” threaded connection is usually provided (more precisely, “T2 mount”: the original “T” type mount is smaller, but almost never occurs nowadays). This connection allows you to install not only specialized "astronomical" cameras, but also conventional cameras with interchangeable lenses (reflex and "mirrorless"). However a modern digital camera will need an adapter, since initially such models use other types of lens mounts; however, finding such an adapter is usually not a problem. And some outdated devices (mostly film ones) initially use T2-mount and can be installed directly, without an adapter.
We also recall that astrophotography often involves long exposures, and for such conditions, the best option would be an equatorial mount system (see "Mounting").
Smartphone adapter
A device that allows you to install a smartphone on a telescope so that the camera of the device “sees” the image in the eyepiece. Thus, you can take photos and videos on your smartphone, as well as use its screen as an eyepiece — for example, if you want to show the image to several people at once.
Tube mount
The method of attaching the tube to the mount provided in the telescope.
Nowadays, three main such methods are used: rings, screws, plate. Here is a more detailed description of each of them:
— Mounting rings. A pair of rings with screw terminals mounted on a mount. The inner diameter of the rings is approximately equal to the thickness of the pipe, and tightening the screws ensures a tight fit. In this case, the telescope tube, usually, does not have any special stops and is held in the rings solely due to friction. In fact, this allows, by loosening the screws, to move the pipe forward or backward, choosing the optimal position for a particular situation. However, one should be careful here: too much displacement of the mount from the middle, especially in refractors with a long tube length, can upset the balance of the entire structure.
Anyway, the rings are quite simple and at the same time convenient and practical, and compatibility with them is limited solely by the diameter of the tube. Thus, it is this type of fastening that is most popular nowadays. Its disadvantages include the need to independently select a fairly stable position of the telescope, as well as monitor the reliable tightening of the screws — loosening them can lead to the tube slipping and even falling out of the rings.
— Mounting plate. In fact, we are talking...about a dovetail mount. A special rail is provided for this on the telescope body, and a platform with a groove on the mount. When installing the pipe on the mount, the rail slides into the groove from the end and is fixed with a special device such as a latch or screw.
One of the key advantages of mounting plates is the ease and speed of mounting and dismounting the telescope. So, unscrewing and tightening a single retainer screw is easier than fiddling with screw fastening or puffs on rings — especially since in many models this screw can be turned by hand, without special tools. And there is no need to talk about latches. The disadvantage of this option can be called exactingness in the quality of materials and manufacturing accuracy — otherwise, a backlash may appear that can noticeably "spoil the life" of the astronomer. In addition, such a mount has very limited possibilities for moving the telescope back and forth on the mount, or even does not have them at all; and the bars and slots can vary in shape and size, which makes it somewhat difficult to select third-party mounts.
— Mounting screws. Mounts with such a mount have a seat in the form of the letter Y, between the “horns” of which the telescope is installed. At the same time, it is attached to the horns on both sides with screws that are screwed directly into the tube; there are at least two screws on each side so that the pipe cannot rotate around the attachment point on its own.
In general, this fixation option is highly reliable and convenient in the process of using the telescope. The screws are tight, without backlash, hold the tube; when they are weakened, the very backlash may appear, but that’s all; in addition, the telescope will stay on the mount and will not fall if at least one screw remains at least partially tightened. In addition, the fixation point is usually located near the centre of gravity, which by default provides optimal balance and eliminates the need for the user to independently look for an attachment point. On the other hand, the installation and removal of the pipe in such mounts requires more time and hassle than in the systems described above; and the location of screw holes and mounting threads are generally different between models, and designs of this type are usually not interchangeable.
Total weight
The total weight of the telescope assembly includes the mount and tripod.
Light weight is convenient primarily for "marching" use and frequent movements from place to place. However, the downside of this is modest performance, high cost, and sometimes both. In addition, a lighter stand smooths out shocks and vibrations worse, which may be important in some situations (for example, if the device is installed near a railway where freight trains often pass).
Light weight is convenient primarily for "marching" use and frequent movements from place to place. However, the downside of this is modest performance, high cost, and sometimes both. In addition, a lighter stand smooths out shocks and vibrations worse, which may be important in some situations (for example, if the device is installed near a railway where freight trains often pass).